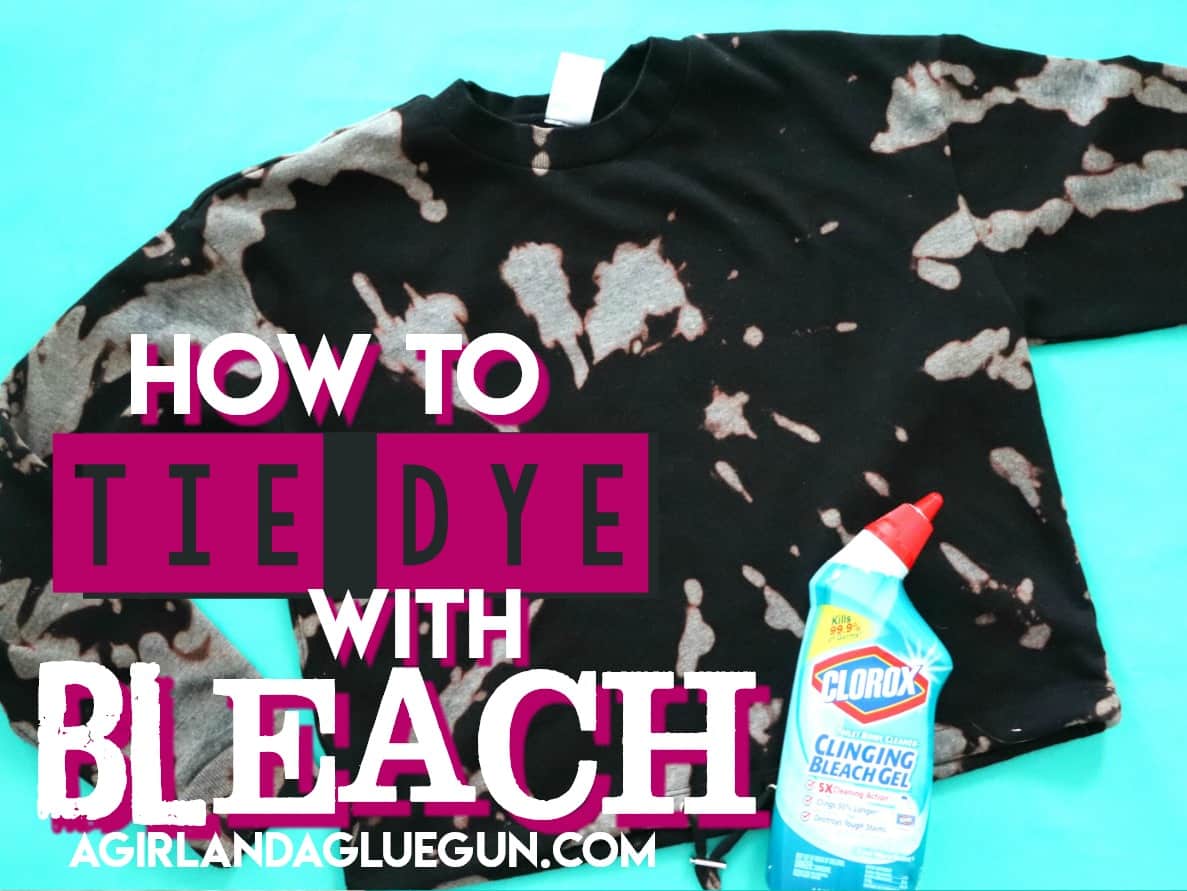
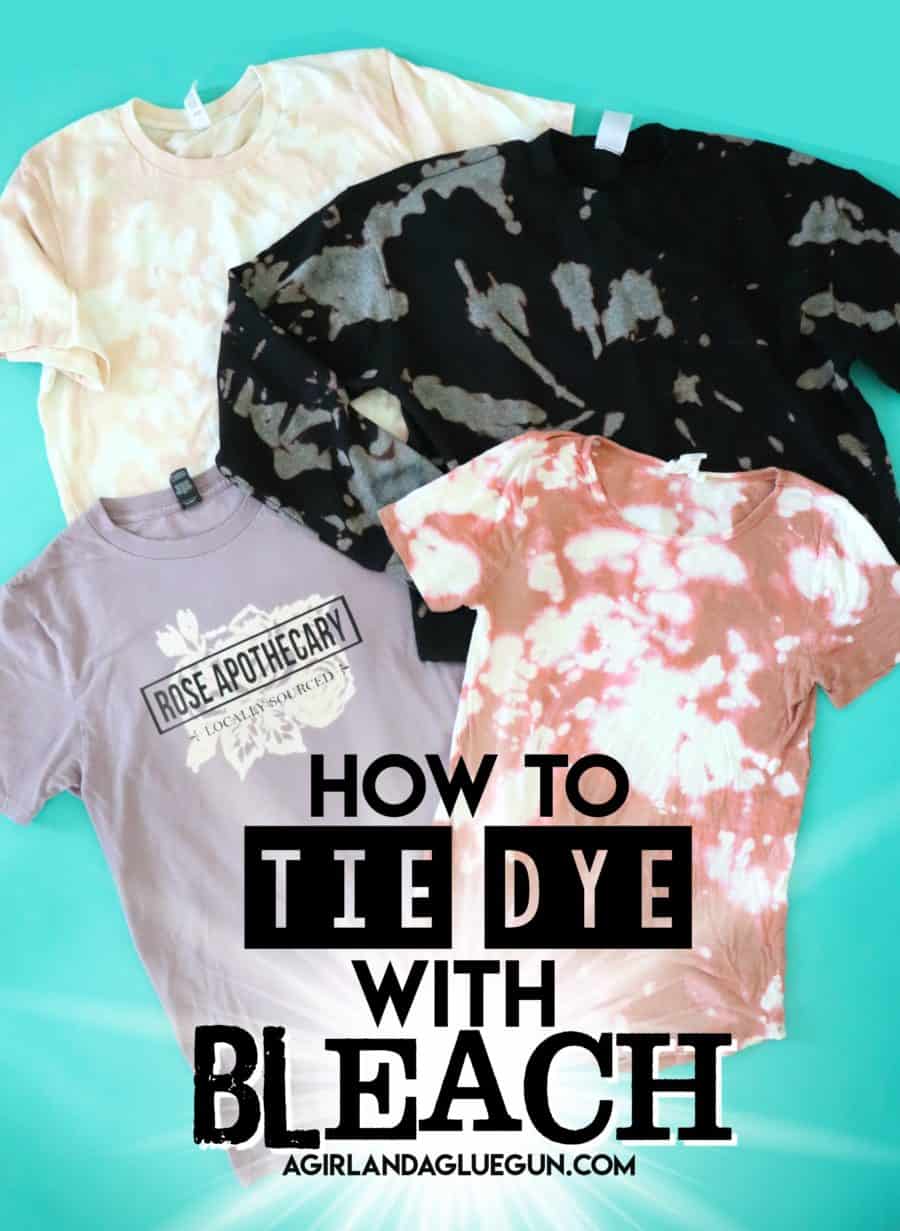
tie dye with bleach gel
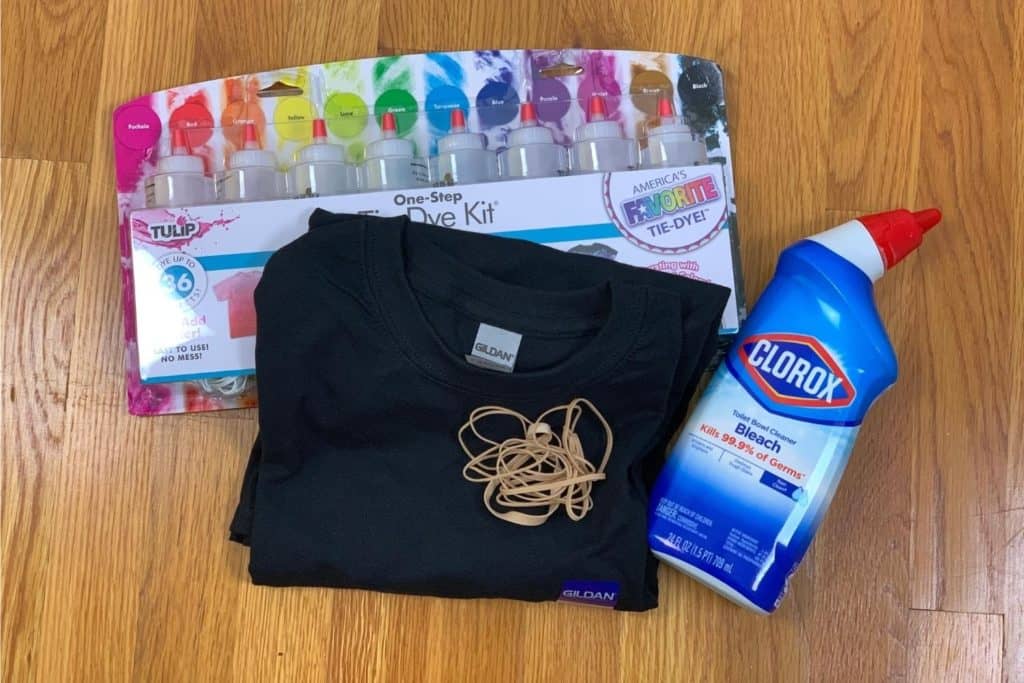
You can also create a bleach solution out of bleach and water to use less bleach. Gel bleach Mom jeans and a cotton t-shirt Elastic Skewerdowel Gloves Bucket Cutter Steps.
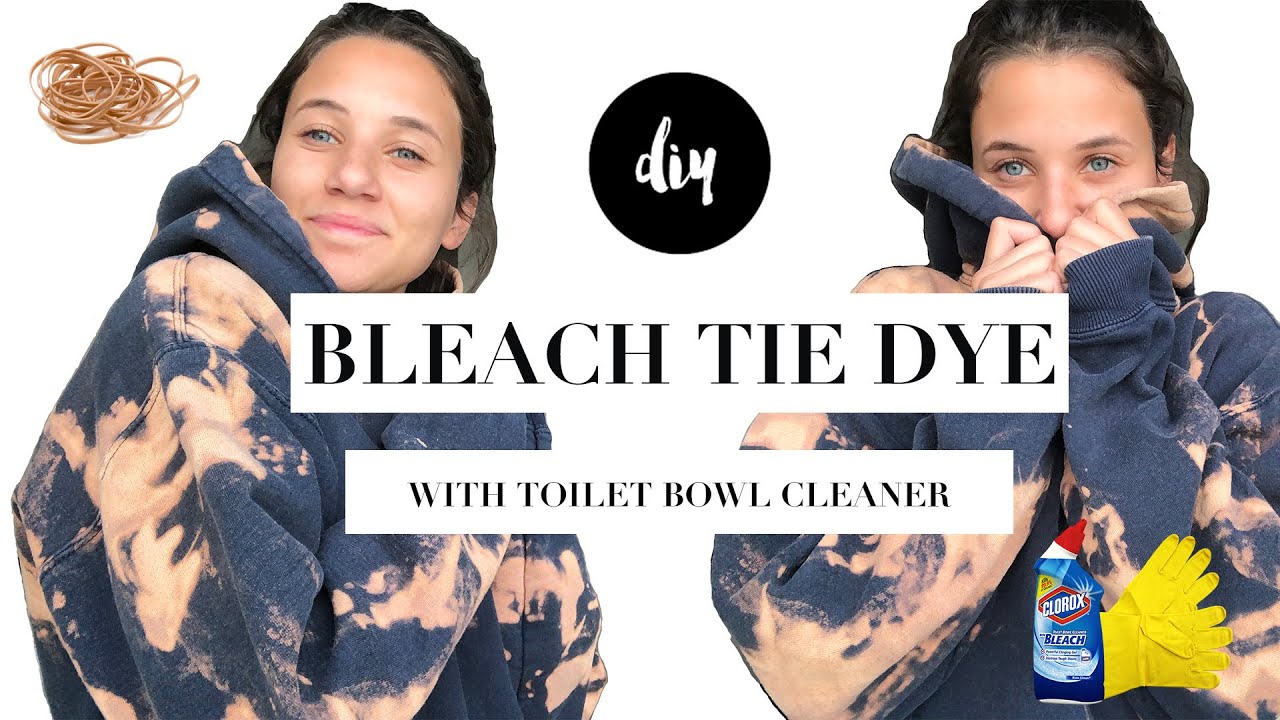
Diy Bleach Tie Dye Toilet Bowl Cleaner Youtube
How to tie-dye with bleach gel This method is cost benefitted as the amount of bleach required is much lesser than the above method.

. Have the neutralizing solution at the ready. Ive heard it will eat through the fabric. Bleach tie-dyeing is a technique that takes the color out of an item instead of adding it like traditional tie-dying does.
Secure with rubber bands 5. Wet t-shirt to make it damp 2. Hit the sides of the bundle with a bit of bleach as well.
For a less saturated tie dye effect you can adjust how much bleach you use. Get the Fabric Wet Soak the fabric in water. Wearing the gloves from your kit apply the Color Changer liquid to all exposed parts of the crumpled shirt rotating the fabric as needed.
I would not recommend using straight bleach. Place the tape over the garment piece to create a striped look. Place your dry crumpled shirt onto a rack if using then mix up one of the bottles of Color Changer from your Reverse Tie-Dye Kit according to instructions.
Learn how to customize your jeans with this fun and simple tutorial. You may want to do this slowly since the dye on the damp shirt will spread quickly. Squeeze your bleach directly onto your damp crumbled and rubber-banded clothes.
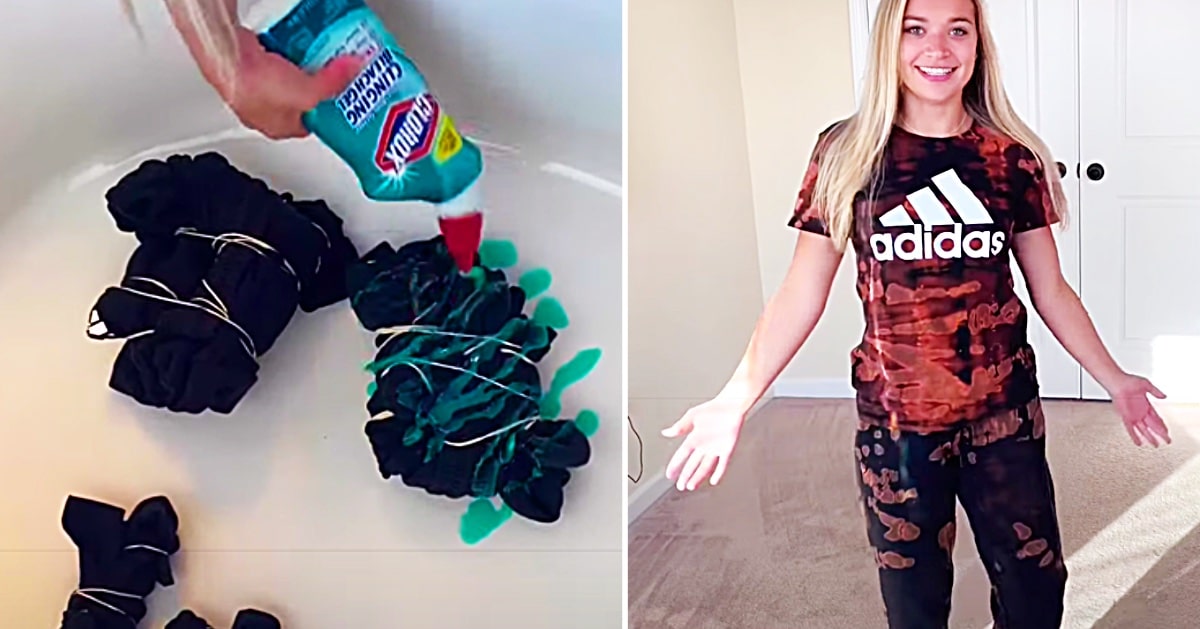
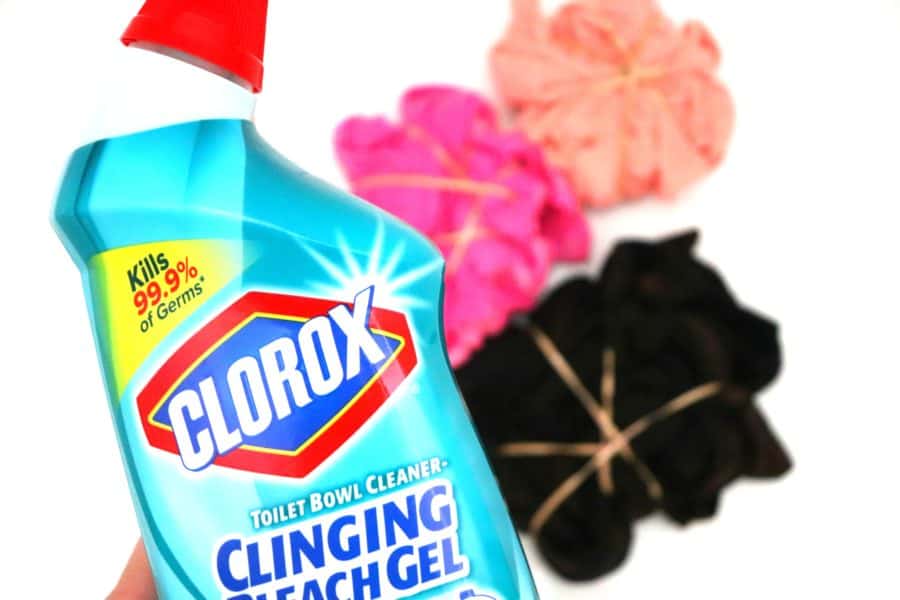
Fill the spray bottle with equal parts water and bleach. Brush bleach -- no need to dilute -- onto the exposed fabric between the taped stripes. Once it is all bunched up use rubber bands to secure it in place creating pie pieces.
To reverse tie-dye mix a solution of 10 parts water and one part chlorine bleach. Soak the Fabric in Bleach Soaking the fabric in bleach is an easy way to ensure that you lighten large areas of the fabric and dont accidentally miss a spot. You will combine 1 part bleach with 1 part water so if you use 2 cups of bleach you will mix in 2 cups of cold water.
Place your shirt on a protected surface in a well-ventilated area. Check out our tie dye with bleach selection for the very best in unique or custom handmade pieces from our womens clothing shops. Gel has more viscosity than liquid so you can make whatever pattern you love with more clarity.
Simply bleach and go or tie dye over the design to create a lovely colorful effect. Just make sure you use enough to get a good saturation of the color. We used 4 rubber bands for 8 sections.
To create a tie-dyed look gather fold and tie the fabric where you would like the pattern to be. So I would recommend mixing bleach with water if you arent using the toilet bowl cleaner. Place a dry shirt over the table and use the gel bottle to bleach it.
How to add the Bleach Dye Place in a sink covered area or bathtub and drizzle the bleach over the top. In a large bucket dilute another mixture of 12 bleach and 12 water. Next secure your shirt with 1-2 rubber bands.
Ive been wanting to tie dye some clothes with clorox toilet bowl cleaner and it FINALLY came back in stock on Amazon a few. We applied the dye strategically trying to add colors next to each other that would blend well if they bled over. Before you start place a heavy piece of cardboard inside the garment to separate the front and back.
Now you just have to wait for the bleach to remove the color. Then wring it out until it is still damp but not soaking wet. Place your shirt on a piece of cardboard plastic bag or in your sink to protect your counters and surfaces.
Add your bleach 6. Get the Tutorial Shibori T-Shirt Using Bleach Rescue a T-shirt that accidentally got bleach spots on it. Create tie-dye stripes using masking tape and bleach.
Bring the t-shirt together to form a tube-like shape. Bleach tie dye only takes about 10 minutes of work and gives you a unique look every tim. Remember there is no defined pattern involved with applying your bleach it is a completely random application.
Wash on cold with mild detergent Spritz 1. Now squirt the bleach gel all over the shirt. Dip the bottom few inches of your garment in the bucket and leave it for 5-10 minutes to create an ombre.
Submerge the gathered and tied fabric and allow it to soak until the background fabric is the color you desire. Do one side and then flip your crumpled bundle over to do the other side. Flip it over and repeat on the other side.
Once the bleach is dry remove the tape to reveal a tie-dyed striped pattern. Remove rubber bands and rinse in cold water 8. We will begin with a beginner friendly method applied on the t-shirt.
Pinch the middle and then start turning twisting and scrunching it in one direction. Lay on a flat surface 3. Let it sit for 10-20 minutes the longer you let it sit the more the bleach will change the color 7.
Next tie a knot from the bottom and then a second one such that you have the entire t-shirt encapsulated. Quarantine and tie dye with me. Grab the center of the shirt and twist 4.
Bleach Tie Dye Patterns Cool and Easy Bleach Tie Dye Shirt This gorgeous tie dye shirt features a stencil covered with bleach gel to achieve that fine detail. You use bleach to take the color out of dark-colored materials which is the opposite of what a colorful tie-dyeing would. Apply the dye to the areas that were bleached out.
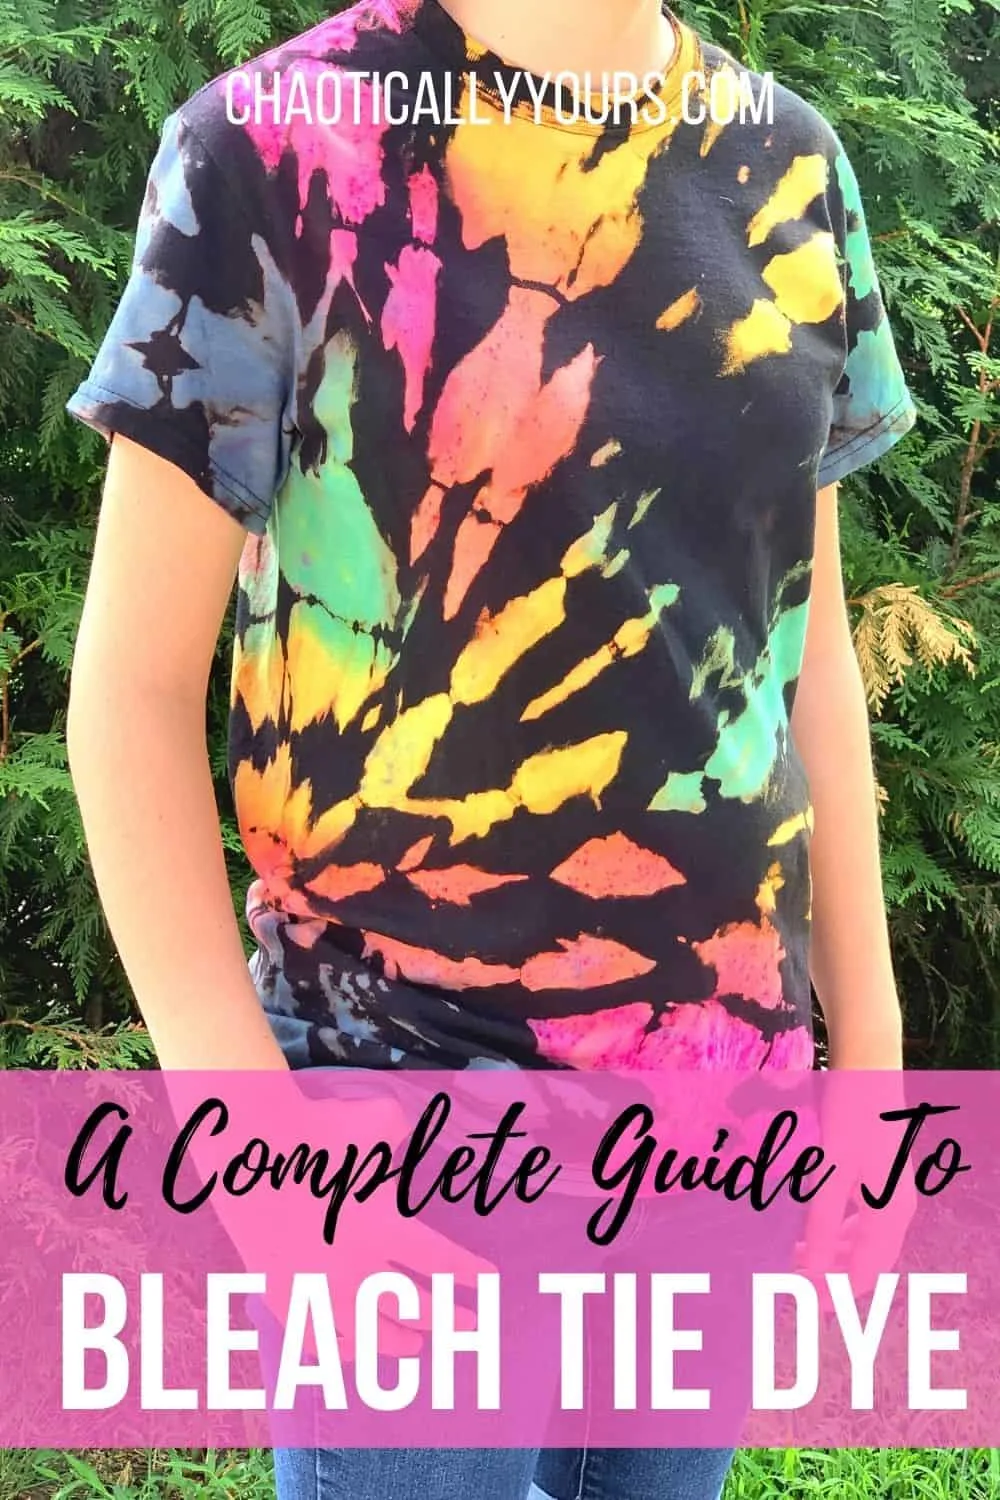
Bleach Tie Dye A K A Reverse Tie Dye Chaotically Yours

Short Cut Tie Dye Our Best Bites
How To Make A Tie Dye Sweat Set Using Gel Bleach
Bleach Tie Dye A K A Reverse Tie Dye Chaotically Yours
How To Tie Dye With Bleach A Girl And A Glue Gun

Pin On Crafts
Short Cut Tie Dye Our Best Bites
How To Tie Dye With Bleach A Girl And A Glue Gun
How To Tie Dye With Bleach A Girl And A Glue Gun